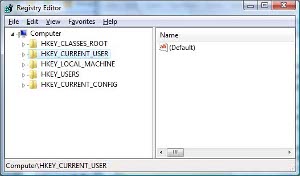
How to Edit the Registry The System Registry is a database used by the Windows operating system. It is used to store hardware, software, and operating system options, settings, and configurations. The registry was originally developed in order to decrease the amount of time that the OS would take to look-up settings while the end-user made selections on the computer. The registry also performs a function as a kernel gateway for the OS. Unfortunately, the longer that you own a computer and add or remove programs, the more junk that collects in your computer's registry which can slow overall PC performance. Additionally, many computer spyware and virus applications make significant modifications to the system registry requiring you to edit the registry to fully recover from the infection.
Backing Up the Registry
Before editing the computer's registry, it is highly recommended by both Microsoft and other computer professionals in case you muck up the editing. This allows graceful recovery from inadvertently editing the registry in an incorrect manner resulting in catastrophic damage to the computer's OS. There are two options for user's to do if a backup of the registry is required, first, copy the user.dat and system.dat files to a blank CD or USB memory stick for a full backup. The second way, is to conduct a partial backup of the registry using the REGEDIT application.

Steps to Backup the Registry Using REGEDIT
Step 1 – Click the “Start” and “Run” menu buttons.
Step 2 – Input “Regedit” followed by the “Enter” key.
Step 3 – Select the “Export Registry File” from the subsequent REGEDIT menu.
Step 4 – Choose the folder to save the registry backup file and enter a name for the file.
Step 5 – Select the “Save” menu button and the registry backup file will be saved to the designated location.
Steps to Edit the Registry Using REGEDIT
Step 1 – Start the REGEDIT application per the instructions provided above and make a backup of the registry settings you intend to modify.
Step 2 – Choose the registry key to edit by left clicking the registry key entry.
Step 3 – Right click the registry entry followed by clicking the “Modify” menu selection.
Step 4 – Input the new registry key value in the “Value Data” text field.
Step 5 - Choose the “Ok” menu button and the registry edit will be saved.
Step 6 – Exit the registry editor by clicking the “X” button in the upper right hand corner of the program window.
How to Delete Registry Entries
Step 1 – Start the registry editor and backup the key or keys that you intend to remove from the registry.
Step 2 – Choose the registry key to remove by single clicking the key.
Step 3 – Click the “Delete” button on the keyboard.
Step 4 – Delete additional registry keys or exit the registry editor to finish deleting registry entries.
How to Find Registry Entries
Step 1 – Open REGEDIT and choose the “Edit” and “Find” menu buttons from the “File” menu.
Step 2 – Enter the key word(s) or filename that you want to find the associated registry entries for in the Operating System registry.
Step 3 – Choose the “Next” menu button and the matching entries will be displayed.
Step 4 – Depress the “F3” function key to view subsequent results found by the registry search.
Step 5 – Follow the above steps to edit or delete the registry entry/entries once you have located them through the find function.
Related Articles
- How to Clean the Registry
- Windows Registry Hacks
- How to Auto-Hide the Taskbar with the Registry
- Free Registry Cleaners
- How to Edit WMV Files


0 comments:
Post a Comment